2.9.1 Packet Tracer – Basic Switch and End Device Configuration Answers Full 100% 2023 2024
This is Cisco 2.9.1 Packet Tracer – Basic Switch and End Device Configuration Answers Full 100% 2023 2024 Cisco CCNA 1 v7 ITN v7.02.
| CCNA 1 v7 & ITN 7.02 | |
| Final Exam Answers | |
| CCNA 1 7.02 - Modules 1 - 3 | |
| Modules 1 - 3 Exam Answers | Online Test |
| CCNA 1 7.02 - Modules 4 - 7 | |
| Modules 4 - 7 Exam Answers | Online Test |
Packet Tracer – Basic Switch and End Device Configuration (Answers Version)
Answers Note: Red font color or gray highlights indicate text that appears in the Answers copy only.
Addressing Table
|
Device |
Interface |
IP Address |
Subnet Mask |
|
[[S1Name]] |
VLAN 1 |
[[S1Add]] |
255.255.255.0 |
|
[[S2Name]] |
VLAN 1 |
[[S2Add]] |
255.255.255.0 |
|
[[PC1Name]] |
NIC |
[[PC1Add]] |
255.255.255.0 |
|
[[PC2Name]] |
NIC |
[[PC2Add]] |
255.255.255.0 |
Objectives
- Configure hostnames and IP addresses on two Cisco Internetwork Operating System (IOS) switches using the command-line interface (CLI).
- Use Cisco IOS commands to specify or limit access to the device configurations.
- Use IOS commands to save the running configuration.
- Configure two host devices with IP addresses.
- Verify connectivity between the two PC end devices.
Scenario
As a recently hired LAN technician, your network manager has asked you to demonstrate your ability to configure a small LAN. Your tasks include configuring initial settings on two switches using the Cisco IOS and configuring IP address parameters on host devices to provide end-to-end connectivity. You are to use two switches and two hosts/PCs on a cabled and powered network.
Instructions
Configure the devices to fulfill the requirements below.
Requirements
- Use a console connection to access each switch.
- Name [[S1Name]] and [[S2Name]] switches.
- Use the [[LinePW]] password for all lines.
- Use the [[SecretPW]] secret password.
- Encrypt all clear text passwords.
- Configure an appropriate message-of-the-day (MOTD) banner.
- Configure addressing for all devices according to the Addressing Table.
- Save your configurations.
- Verify connectivity between all devices.
Note: Click Check Results to see your progress. Click Reset Activity to generate a new set of requirements. If you click on this before you complete the activity, all configurations will be lost.
ID: [[indexNames]][[indexPWs]][[indexAdds]][[indexTopos]]
End of Document
Answers Notes
The following information is for the Answers version only.
This activity uses variables that are randomly generated each time the activity is open or the “Reset Activity” button is clicked. Although the tables below show device names mapping to specific address schemes, the names and addresses are not bound together. For example, a student could get the device names shown in Scenario 1 with the addressing shown in Scenario 2. In addition, one of three versions of the topology will be presented to the student.
Scenario 1
|
Device |
Interface |
Address |
Subnet Mask |
|
Class-A |
VLAN 1 |
128.107.20.10 |
255.255.255.0 |
|
Class-B |
VLAN1 |
128.107.20.15 |
255.255.255.0 |
|
Student-1 |
NIC |
128.107.20.25 |
255.255.255.0 |
|
Student-2 |
NIC |
128.107.20.30 |
255.255.255.0 |
Scenario 2
|
Device |
Interface |
Address |
Subnet Mask |
|
Room-145 |
VLAN 1 |
172.16.5.35 |
255.255.255.0 |
|
Room-146 |
VLAN 1 |
172.16.5.40 |
255.255.255.0 |
|
Manager |
NIC |
172.16.5.50 |
255.255.255.0 |
|
Reception |
NIC |
172.16.5.60 |
255.255.255.0 |
Scenario 3
|
Device |
Interface |
Address |
Subnet Mask |
|
ASw-1 |
VLAN 1 |
10.10.10.100 |
255.255.255.0 |
|
ASw-2 |
VLAN 1 |
10.10.10.150 |
255.255.255.0 |
|
User-01 |
NIC |
10.10.10.4 |
255.255.255.0 |
|
User-02 |
NIC |
10.10.10.5 |
255.255.255.0 |
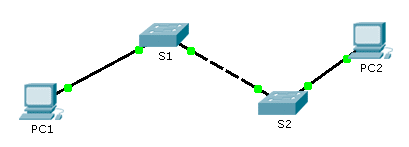
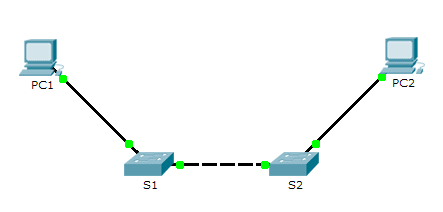
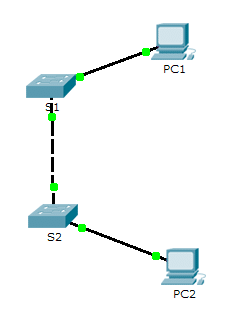
Topology Isomorphs
| CCNA 1 v7 & ITN 7.02 | |
| Final Exam Answers | |
| CCNA 1 7.02 - Modules 1 - 3 | |
| Modules 1 - 3 Exam Answers | Online Test |
| CCNA 1 7.02 - Modules 4 - 7 | |
| Modules 4 - 7 Exam Answers | Online Test |


